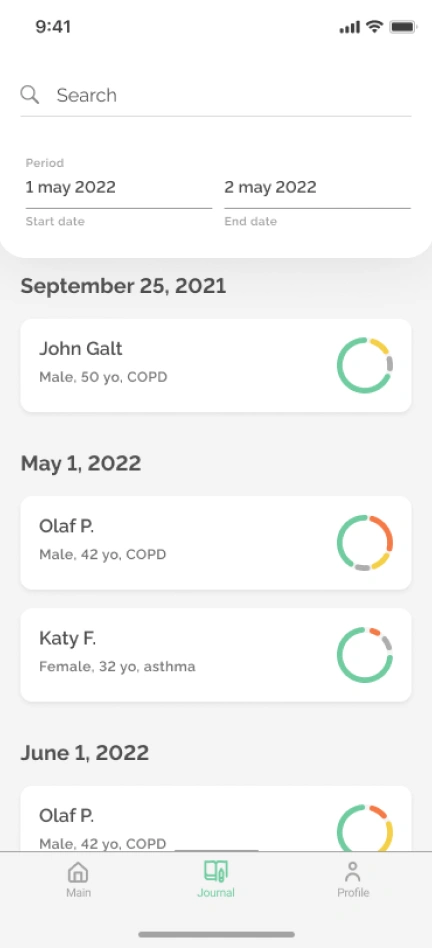
See the list of all saved lung exams in chronological order;
Filter the list by period or by a patient’s name to see the list of respective lung exams;
Open a lung exam card to access the recordings made, incl. their analysis. It is possible to share these
recordings with other healthcare providers.
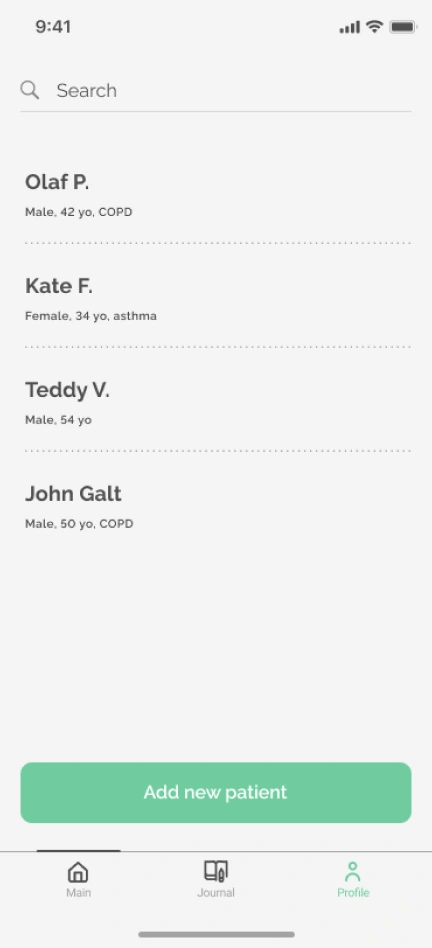
Profiles list screen
On the Patients tab, you can:
See the list of created patients profiles;
Search through the list for a particular patient profile;
Create a new patient profile by listing their ID, name, sex, date of birth, chronic conditions, etc.
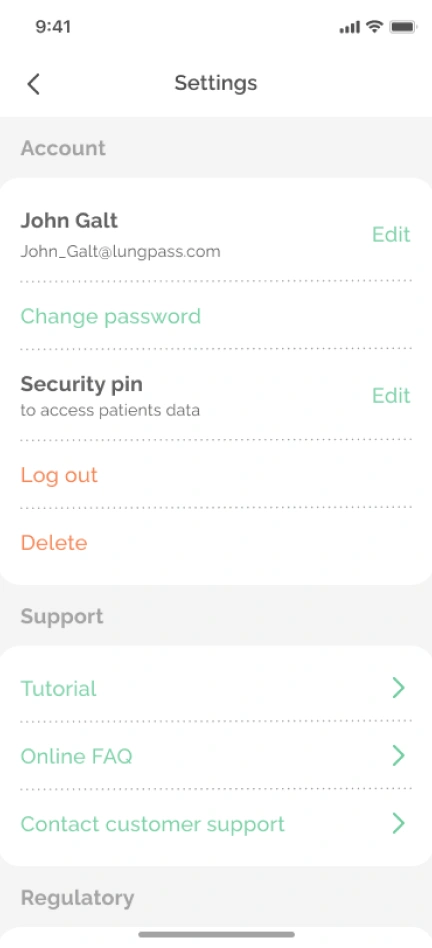
Settings screen
To manage your (provider) account, select the Settings icon on the top right of the Main screen.
On the Settings screen, you can:
Edit your email address;
Change password;
Log out from the app;
Delete account.
You can also access various support materials:
Interactive guide is a 5 min introduction into the product that explains how to operate the ChestPal Pro
device and produce high-quality lung sound recordings.
Online FAQ gives you quick access to a web resource with frequently asked questions and answers about
the product.
Contact customer support - an option to contact our specialists directly. Write a question or describe
your problem and email it to us.
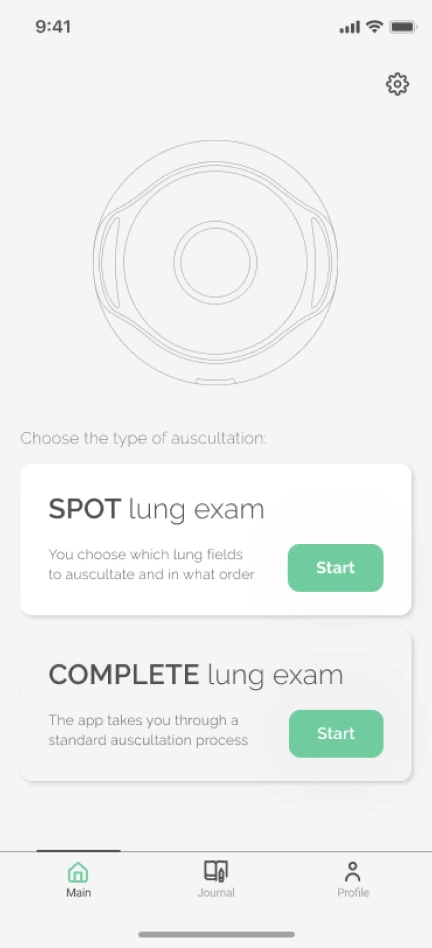
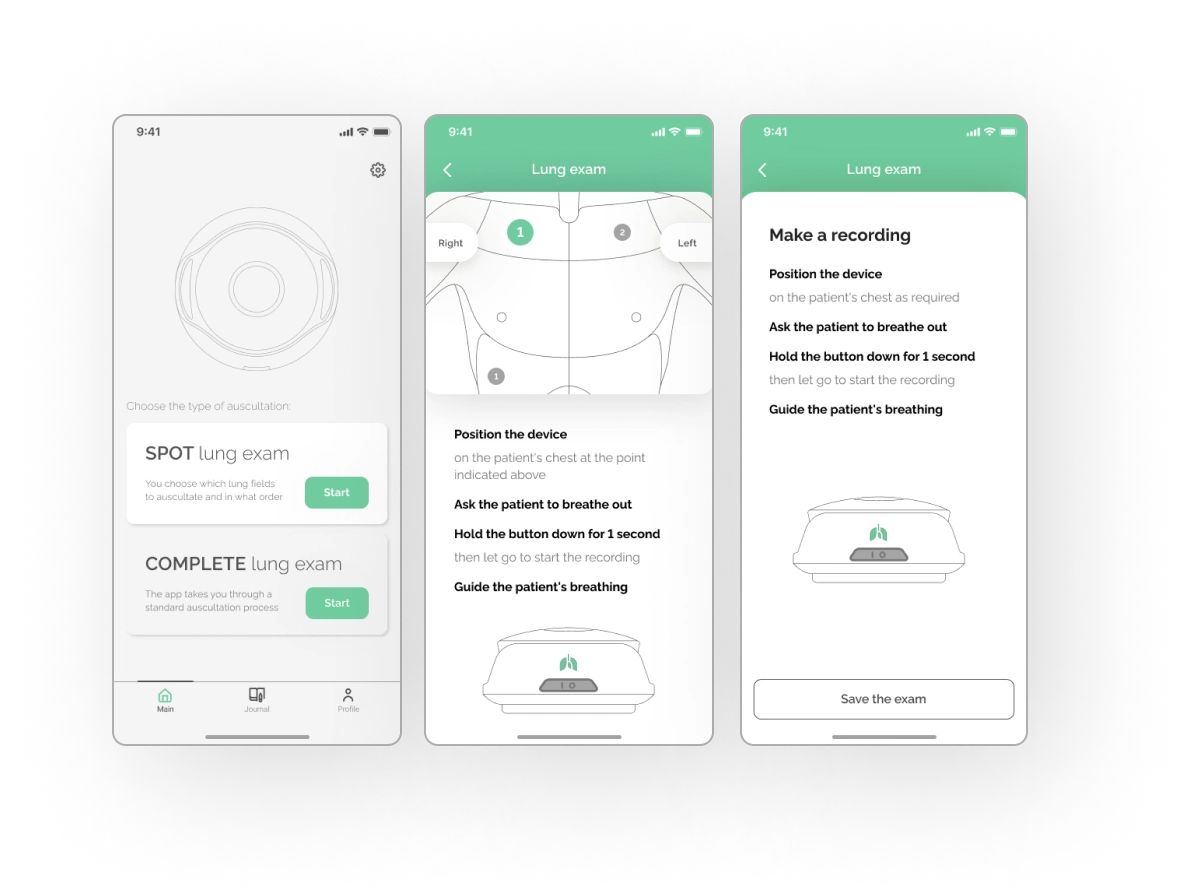
Choosing the appropriate lung exam type
When performing a lung exam with ChestPal Pro, you can choose between Spot and Complete modes.
A Spot lung exam is best for capturing sounds from select lung areas. It is most convenient when you need a
quick check of your patient’s lungs.
A Complete lung exam is best for capturing sounds from all lung areas. It may be useful for an in-depth
assessment of a patient presenting with respiratory symptoms.
The difference between Spot and Complete lung exams is in how a placement area for the stethoscope is
selected:
In the Spot exam, you choose which lung areas to record and in what order. You can save one or more
recordings per lung area.
In the Complete exam, you follow a pre-defined lung exam scheme. You can save up to 11 recordings, one
per lung area.
Conducting a lung exam
For an example of how to most successfully use ChestPal Pro in your daily practice, please watch the video
below:
In the app, start a lung exam by tapping on either Spot or Complete lung exam card.
Connect the stethoscope to the app. If you need help connecting ChestPal Pro to the app, check this article -
Connecting the stethoscope
Instruct the patient to take deep breaths in and out through an open mouth during the recording.
Place the stethoscope firmly onto a patient's clean intact skin as required.
Ask the patient to breathe out.
Hold the Control button on the stethoscope down for one second, then let go to start the recording.
Guide the patient’s breathing throughout the recording. It is recommended that one recording contains
two complete breathing cycles.
Once the recording is complete, you will see the lung sound analysis result for that recording displayed
in the app. Listen to the recording you made to ensure it is of high quality, i.e. you can clearly hear
the breathing cycle and no artifacts are present. You can re-do, save, or discard the recording made.
When playing back a recording, it is recommended to use a connected headset for improved sound
quality (not provided as part of the ChestPal Pro package).
Re-do a recording if you do not believe it is of high quality.
Follow steps 3 – 6 to further record lung sounds at required placement positions.
Once you have completed the exam, tap on Save exam button to save it. A Results screen will be displayed.
Note that once the exam is saved, it is impossible to modify the recordings made.
To assign the saved exam to a patient profile, tap on Assign exam button at the bottom of the Results
screen in the app.
To learn about most common reasons for non-informative recordings and how to correct them, please watch the
video below:
For useful tips on how to most successfully use ChestPal Pro in your daily practice, please watch the video
below:
In summary:
Getting ready:
The stethoscope should be sufficiently charged and cleaned before use.
Lung sounds should be recorded in a quiet environment. Close-proximity conversation, loud background
noises and other external sounds will affect the record quality and analysis.
Remove clothing and accessories from the upper body of the patient whose lung sounds you will be
recording.
During the recording:
Make sure the patient is breathing deeply in and out through an open mouth.
Do not move your fingers on the stethoscope. Instead, once the recording starts, hold your fingers in
the exact same position on the device until the recording ends.
Do not move the stethoscope on the body.
Make sure no skin folds or body hair is touching the stethoscope’s membrane. Please reposition ChestPal
Pro or remove hair if necessary.
After the recording:
In case of artifacts presence, ask the patient to breathe deeper through an open mouth, making two
complete breathing cycles within one recording. Make sure to eliminate the possible causes of artifacts
when doing a recording.
In case of heartbeat detection, reposition the stethoscope further away from the heart and ask the
patient to breathe deeper through an open mouth, making two complete breathing cycles within one
recording.
For patients with low BMI, especially young children, the heartbeat analysis might be constantly present
in the exam.
Note:
If the patient starts feeling out of breath or lightheaded due to deep breathing during the recording
process, the recording process should be stopped immediately, and the patient should get some rest. Do not
continue recording until the patient feels better.
ChestPal Pro should be used only on patients capable of breathing in and out deeply through an open mouth
during the lung sound recording process.
ChestPal Pro is not intended for children less than 3 years old.
ChestPal Pro has not been tested for accuracy with lung sound recordings taken from users with pacemakers or
other cardiac implanted electronic devices.
How to interpret the result of the exam
The app provides an automatic computer analysis of lung sound recordings.
It differentiates between 5 types of sounds: normal breathing, wheeze, crackles, artifacts and heartbeat.
The algorithm uses spectrograms – a visual representation of sounds – to do such analysis.
Normal breathing, wheezes, crackles, and heartbeat analyses are provided when the spectrogram created by
the user receives the highest match with a respective class of spectrograms derived from recordings labelled
by respiratory specialists.
Artifacts analysis is provided when the spectrogram created by the user receives the highest match with
a class of spectrograms derived from recordings of skin or hair rubbing against the stethoscope membrane,
fingers moving on the stethoscope during the recording, stethoscope repositioning during the recording,
electromagnetic interference, background noise, etc.
After you make a lung sound recording, you will see a spectrogram together with the automated analysis of that recording on the app’s screen. The spectrogram may help you see subtle lung sounds that are hard
to hear or missed by the human ear. You can also play back the recording you made
(headphones are strongly recommended).
Here are some examples of lung sound recordings and
the respective spectrograms:
If you forgot your password, please do the following:
Open the ChestPal Pro app on your phone.
Tap "Forgot password?".
Enter the email you used to create your ChestPal Pro account then select "Submit".
Go to your inbox associated with the email used for your ChestPal Pro account. Open the ChestPal Pro
password reset email.
Select the "Reset Password" button within the email, and you will be taken to a web page to reset your
password.
Enter your ChestPal Pro email then enter your new password twice.
When finished, select "Submit New Password".
Once completed, you will see a notification which states "Your password has been updated".
You can now re-open the ChestPal Pro app, and use the new password to log in.
Note:
If you don’t have access to that email address to complete the reset process, or if you did not receive the
password reset email, please:
Note that the email should arrive within 10 minutes after you send the request.
Check your spam folder to see if the email has gone there.
How to change the email associated with an account
If you need to change the email associated with an account, inform your organization's admin of such need.
They would need to log in to the admin account on chestpal.com/account, and update your email in the User list.